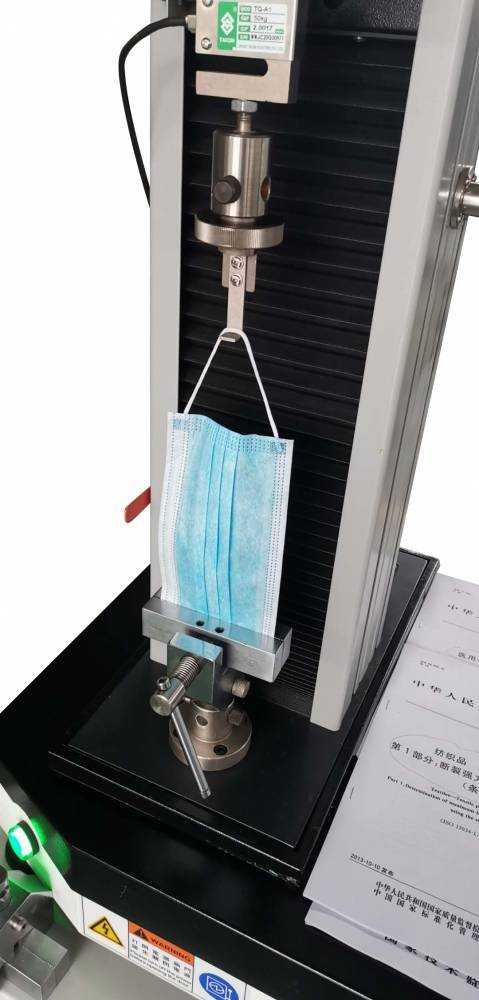
Measures the tensile strength and elongation of face mask materials and components.
WhatsApp : +86 13816217984
Email : info@qinsun-lab.com

Introduction:
The test machine uses the integrated structure of the motor and the speed control system to drive the synchronous belt deceleration mechanism, and drives the lead screw pair to load after deceleration. The electrical part consists of a load measuring system and a deformation measuring system. All control parameters and measurement results can be real time displayed on the LCD screen. And it has overload protection, displacement measurement and other functions. It can used for a variety of textiles and automotive interior materials tensile strength, tensile break elongation (or elongation rate) test. It can also be used for zipper, leather strength test.
Mask Tensile Testing Machine Application:
It can used for a variety of textiles and automotive interior materials tensile strength, tensile break elongation (or elongation rate) test. It can also be used for zipper, leather strength test.
標準:
GB/T 32610-2016
GB 19083-2010
2011年4月69日
GB 2626-2006
GB 2890-2009
GB/T 16556-2007
GA 124-2013
Product features:
1. easy to operate, anyone can easily operate
2、Measurement accuracy is high, through the third-party testing organizations certification
3. high speed, low vibration, low noise motor drive device
4、High rigidity design, sturdy and durable
5、Multi-language application function, adapting to the use of different countries
6、With automatic return to the beginning of the test automatically after the completion of the test function of automatic return to the beginning of the test
7、Automatic calculation of maximum force, minimum force, average force, maximum deformation, elongation, strength and other functions.
8. with tensile, bending, compression, folding, adhesion, tearing, peeling, elongation
9. with mechanical travel switch; emergency stop switch; overcurrent, overvoltage, undercurrent, undervoltage, leakage overload protection
10. software overload limit protection; breakpoint shutdown protection and other multiple protection devices
技術パラメータ:
Maximum test force: 100N (5000N optional)
Operation mode: microcomputer, full Chinese menu operation
Measuring range: 0-100N
Accuracy level: 1 level / 0.5 level
Accuracy of the test force: better than ± 1% of the value
Test force: the minimum resolution of 0.001N
Displacement measurement: the resolution of 0.01mm
Accuracy of the deformation: better than ± 1%
speed regulation Range: 0.001mm/min~~500 mm/min (infinitely variable)
Test Speed: 50 100 150 200 250 300 500mm/min
Tensile Stroke: 700mm
Overall Dimension of Main Machine: 540mm(L)×280mm(B)×1450mm(H)
Power Source: AC 220V 50Hz
Net Weight of Main Machine: 80kg


免責事項: 上記のコンテンツは,業界内部者のみの参照およびコミュニケーションのためであり,その正確性または完全性を保証しません.関連法規および本ウェブサイトの規制により,関連品を購入するユニットまたは個人は,有効な資格および資格条件を取得する必要があります.
会社電話
+86-21-6420 0566
営業時間
月曜日から金曜日
携帯電話:
13816217984
メール:
info@qinsun-lab.com
